EdinbR.org is hosted through Github Pages and so is actually built from a public github repository which means anyone can contribute!
The site is powered by a static-site generator called Jekyll and takes blog posts written in simple markdown format, so it’s very easy to write posts without any HTML, CSS or Javascript. Here’s a quick guide on how to get started, either via the fantastic Github web interface, or via your own locally cloned version.
Easy method: Github web interface
Writing a new post can be done without any knowledge of the git version control system, all you need is a free github account. Here’s a step-by-step walkthrough, if you get stuck you might want to check out the excellent Jekyll documentation.
- Create github account and login. Head to our github-pages repository at: github.com/EdinbR/EdinbR.github.io and enter the
_posts/directory.- Simply click the
+arrow to fork the repository and create a new file! Name your file in the formatYYYY-MM-DD-short-title-summary.markdown— that’s it’s publication date first, then some keywords related to the title of the post. For example, the file for the July 2015 announcement was called2015-07-08-july-meeting.markdown(see it here).

- Open a previous markdown file and copy its contents across. Go back to the file for July for example, click the pencil edit icon and copy-paste the full post to your new file.
- Update the YAML frontmatter for your new post. Change the
title,dateandcategoriesinformation to reflect what you’re posting about. For theauthorfield, think of an author id, or use the defaultedinbrto set the group as the post author. New authors need to add an entry to theauthors.ymlfile, fields are described in the README. - Now write the content! See this guide for a full description of how to write blog posts, also look at the markdown for previous posts and you’ll be able to see how it works.
- When finished, hit the
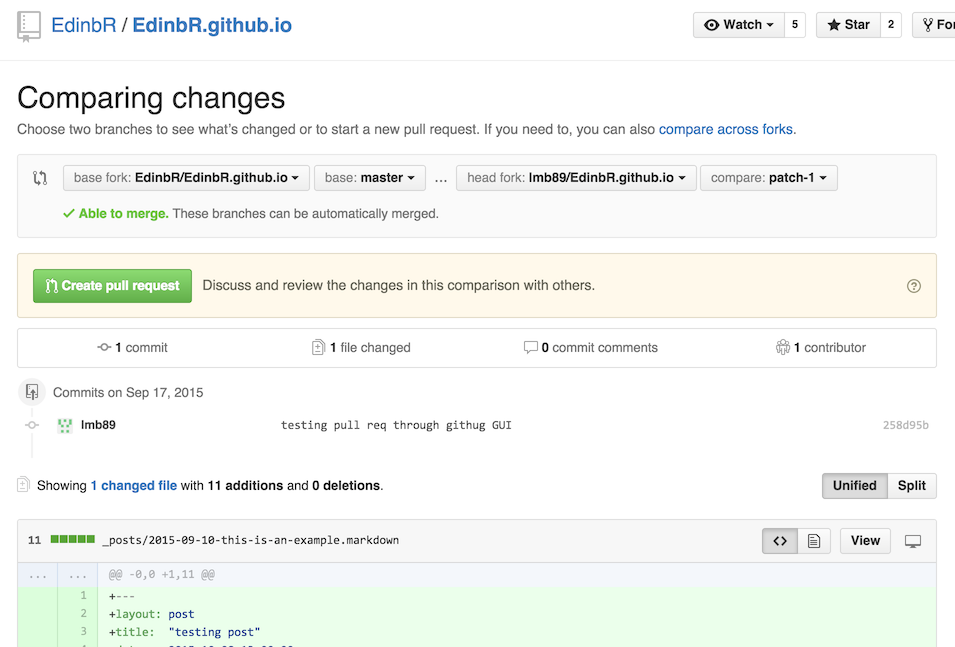
Propose new filebutton, then hitCreate pull requeston the next screen.

- That’s it! The pull request is complete, and notifications will go out to those watching the repository. Someone with write access will then merge your changes with the master branch of the repository. (Even if you have write access yourself, it can still be a good idea to work through pull requests: you let everyone know what’s being added and give the chance for comments and discussion before going live.)
- Simply click the
If you get stuck along the way, you can open a new issue at the website repository and ask for some help.
More advanced: fork a local git repository
If you know git and are used to contributing to github projects you can probably figure out how Jekyll works. Clone the repository as normal, add and edit files locally in your editor of choice and send a pull request when you’re happy! Steps in the previous section describe the naming convention for posts and the YAML fields to edit. Starting by duplicating the markdown of the most recent post and editing it is probably a good idea.
To preview your post while writing, use your local Jekyll install to run jekyll serve from your base directory, then point your browser to 0.0.0.0:4000. You should see the site served locally with your new post. You can also make use of Jekyll drafts if you don’t want to write in the _posts directory (e.g. are writing something over a few days).
Note that Github is currently running the jekyll build stuff on their servers (which is why changes we make to markdown files through the Github web interface are auto-magically reflected in the site we’re serving). Down the road you might find we need additional Jekyll plug-ins that aren’t provided by Github. In that case we can use Jekyll locally to build our own site and push the generated HTML files to the master branch ourselves.
As above, if you get stuck you can open an issue for some assistance :)